

There are plenty of computers out there that cannot run Windows 10 but still have some life left in them. There are also plenty of users who are entirely happy with Windows 7 and don't want to upgrade. Regardless of why there are still quite a few users who may be wondering how to record video on Windows 7. In this post, we'll cover some of the best options for doing so, give you some brief instructions on how to record your screen using them, and wrap things up with a simple comparison of all the options discussed.
How to Record Your Screen on Windows 7 with Desktop Recorders
Desktop recorders are software programs that you download to your computer and run natively as you would any other application. These screen recorders for Windows 7 tend to be fast and reliable because they are not limited to a network connection. However, they do not work well in situations where you cannot install software on the computer, such as a work computer or other machine that doesn't belong to you.
You can see reviews for Movavi Screen Recorder at the link below:
Movavi Screen Recorder reviews at G2
Windows 7's Built-in Game Bar
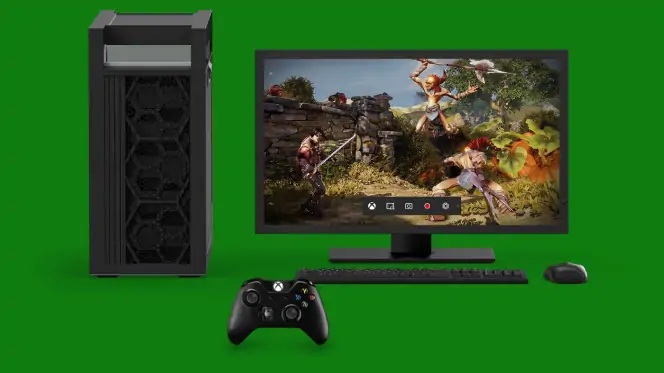
You may have heard friends or acquaintances talk about recording their screen with the Game Bar – a built-in Windows software. If you've tried to find it on Windows 7, you may be under the impression that it's hidden somewhere impossible to find. Unfortunately, this recording tool is not available for Windows 7. It was initially a part of the Xbox app designed specifically for Windows 10, as more recent Xbox models also use that operating system. It is useful for recording games and other apps built for Windows 10 and designed to be Xbox compatible. It includes every app available from the Windows Marketplace and some that aren't.
If your computer meets the specifications and requirements for Windows 10, you can upgrade and get access to the Windows 10 Game Bar. With Windows 10, recording a video from the screen is as simple as pressing the Windows + G key combination to bring up the Windows 10 Game Bar and then pressing the record button on the overlay that pops up. Windows will then record the video until you tell it to stop and save the results in the folder that you set in the program's settings menus.
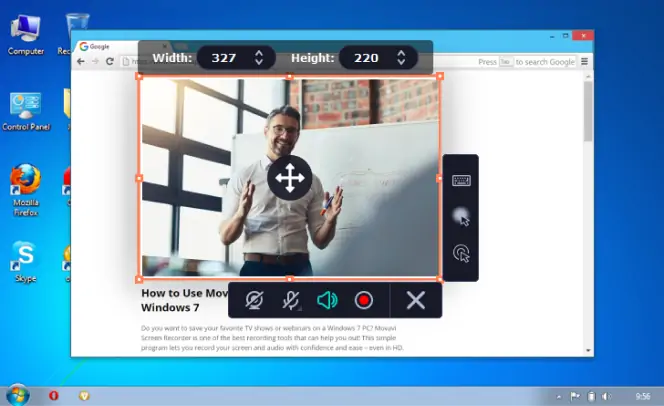
Suppose you don't want to upgrade to Windows 10. In that case, Movavi Screen Recorder makes an excellent alternative that is nearly as quick to use as the native Windows 10 solution and gives greater control over the output.
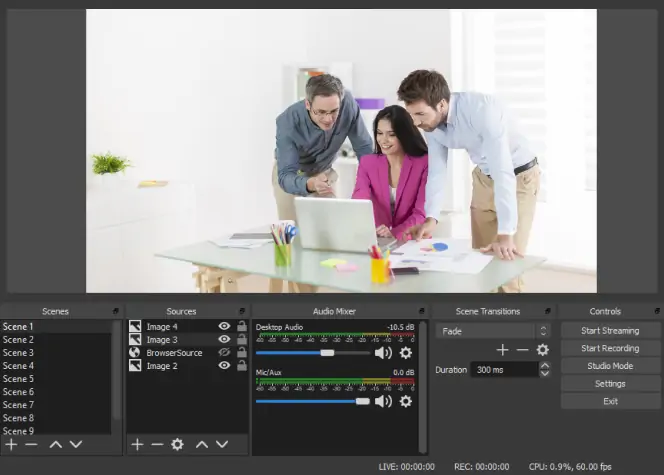
OBS is a compelling solution for broadcasting streaming video, with many great features for mixing and combining sources to create a very professional look. This power comes at a cost, though. The software was designed for hardcore streamers who need strict control over every second of their stream. For a simple push-and-record scenario, it isn't effortless to use and not as intuitive as other solutions on the market. The software is free and worth a try if you don't mind a bit of a learning curve and look for something with a lot of flexibility.
Recording with OBS is more complicated than recording with most Windows 7 video recorder software. After you've downloaded and installed the software, you'll need to do some setup that other programs don't require. Before you can record, you have to create a scene. To do so, click the + icon in the section of the OBS window marked Scenes. Give the scene a name and then move over to the section marked Sources. Click the + icon there to add a source. Select Display Capture to capture your display. Now you can press the alt key and drag the mouse to crop the capture area. Once everything is ready, press the Start Recording button to begin the capture process.
To find out more about OBS, follow the link below:
How to Do Screen Video Capture on Windows 7 with an Online Recorder
While one option on this list requires you to download a tiny help utility, most only recorders allow you to capture your screen without downloading any additional software. With these tools, you can record video on a PC using nothing but a browser and an internet connection. Of course, the downside is that any internet connectivity problems will prevent you from using the software.
Apowersoft is a website that allows for screen video capture on Windows 7 straight from a browser. The website does require that you download a small helper application that will enable it to better communicate with your computer. But the actual recording process will be started from the website. This little download gives it some of the features that its fully native counterparts have, such as selecting which parts of the screen to record. When you are done recording, the software lets you save the file to disk or upload it to popular video and cloud storage services.
After you've downloaded and installed the helper application, recording with Apowersoft's free online screen recorder is easy. Browse to the website and press the Start Recording button in the middle of the screen. The application will open up, and you can choose between a screenshot and video capture. After choosing video capture, you'll hit the Record button to start recording and the Stop button to finish. To save the file, click the share icon in the bottom right corner of the window and choose to save it to a file rather than upload it to a cloud service.
You can read more about Apowersoft's free screen recorder in the link below:
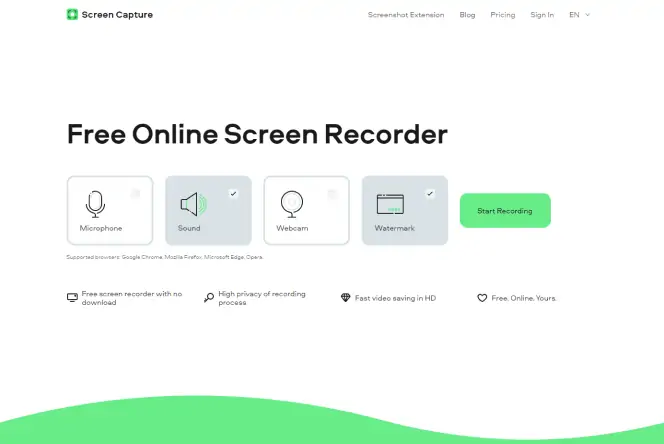
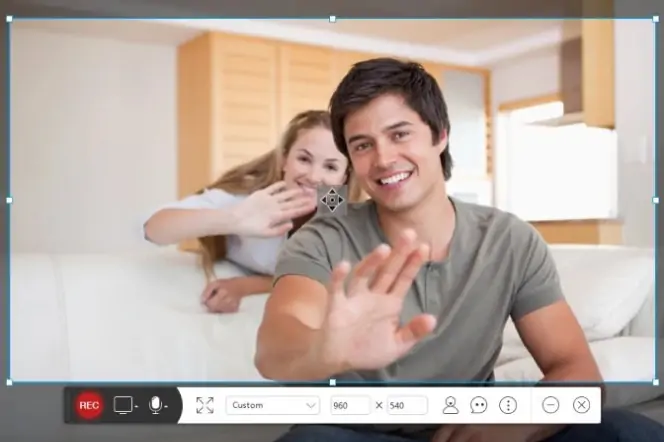
The need for a download puts many people off of using Apowersoft. Screencapture.com is a new service that is still growing, but it already has an advantage over Apowersoft in that it doesn't require any downloads to work. There is a free version of the tool that will place a small watermark on the recorded video. The web-based tool functions are a webcam recorder and a screen recorder for Windows 7 and other platforms. Users will likely find the site easy to use and convenient.
To record a screen with screencapture.com, you only need to go to the website, select your options, and press Start Recording. A dialog will pop up asking for permission to access the required functionality to record the screen from your browser. You can choose to record your entire screen, a specific open window, or an open tab in the browser you are visiting the site from. Once you confirm the permissions and the recording area, the capture process will begin.
How to Use Google Chrome Extensions as Windows 7 Video Recorders
The Google Chrome extensions below are like a cross between the previous two options. You'll be using your Chrome web browser as the host for a screen recording program, but the two extensions listed work when the machine is offline. So you have the benefit of a locally installed screen recorder and the convenience of not having to open an extra app to use it.
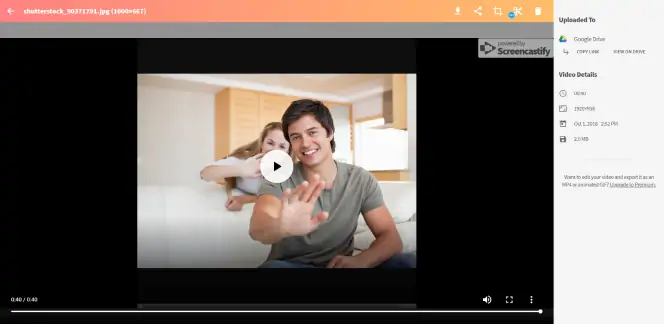
For a browser-based screen capture tool, Screencastify comes with a pretty hefty feature set. You can record your desktop, browser tab, or webcam in full HD and get audio from your microphone to add narration to the video. Videos can be saved locally but are also automatically saved to Google Drive. Essential editing tools allow you to trim the start and end of your videos and draw on the video with a pen tool. For an upgrade fee, it can merge, crop, and add text to the video that you've captured.
You must be using Chrome to use this software. From your Chrome browser, visit the Chrome web store and search for Screencastify. When you find it, click on Add to Chrome and confirm the addition. It will be added to the top right of the toolbar. When you click on that, it'll take you to a sign-in page. Create an account and sign in. You'll then be asked to give the required permissions. When you click the button in the toolbar, you can choose a recording method and start recording.
Screencastify has an average 4-star rating and over 10 million users:
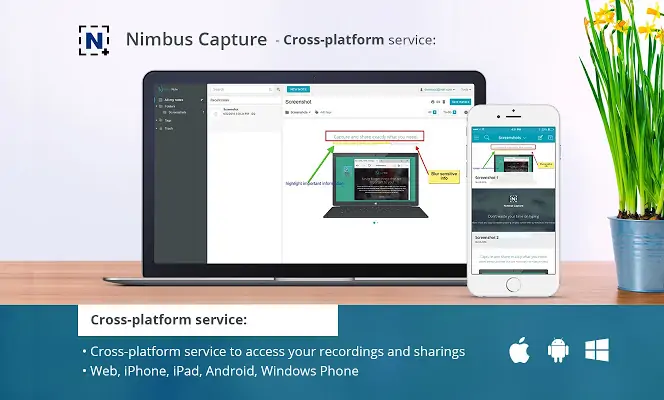
This Chrome extension is a competent entry into the market. It allows you to capture video from your screen or webcam and even customize the video screen resolution and frame rate. Several features are reserved for the premium version, such as trimming and cropping your video, adding your watermark, and uploading your videos to Google Drive or Dropbox. The free version allows you to save your file locally or upload it to their cloud platform, Nimbus Note.
Install the extension into your Chrome browser by visiting its page in the Chrome web store and clicking on the Add to Chrome button. After confirming that you want to add the extension, it will be installed in Chrome, and its icon will appear in the toolbar. Clicking on the icon will bring up the settings menu. Here, you can choose whether you want to record from the microphone, the computer's audio, or both. After determining whether to record from a tab or the entire desktop, you can hit record to begin recording. When you stop the recording, it will open in a new tab and allow you to save it.
Nimbus Screenshot and Screen Video Recorder has over a million users and a nearly 5-star rating:
Nimbus Screenshot and Screen Video Recorder on the Chrome web store
Software Comparison
Now, when you know how to record your screen on Windows 7, let's take a final look at all the software we've discussed.
Software | Pros | Cons |
|---|---|---|
| Movavi Screen Recorder | Easy-to-use, Integrates nicely with other Movavi video editing products | Some features must be purchased |
| Windows 7's Built-in Game Bar | It’s a free built-in program | Has limitations to what it can capture |
| OBS Studio | Highly configurable for advanced screen broadcasting tasks | Has a steep learning curve |
| Apowersoft Online Recorder | Lightweight download | Requires a download despite being web-based |
| Screencapture.com | Fully web-based without requiring a download | Requires payment to remove a watermark |
| Screencastify | Save files directly to Google Drive for convenient backup | The free version is limited to 5-minutes |
| Nimbus Screenshot & Screen Video Recorder | Includes an excellent range of editing tools | Features that are free in Screencastify are premium in Nimbus |
How to Record Your Screen on Windows 7
1. Install the Movavi Software
First, install and launch Movavi Screen Recorder on your PC.
2. Adjust the Settings for the Session
Click the Cogwheel icon and set the parameters as necessary in the dialog box that appears. Сlick OK.
3. Start Recording
Click Screen recording and select the part of the screen you want to capture. Make sure the settings are as you want them for the Webcam, Microphone, and System Audio (they can be activated or deactivated depending on your needs).
Click REC to begin the process after a short countdown. You can use the Screenshot and Pause buttons during the recording. Click Stop to finish.
4. Export the File
Click Export. In the dialog box that appears, name the file and choose the output format. Click Save.


0 Comments